Some tips on working around UVM limitations in Verilator. Part 2

Some tips on working around UVM limitations in Verilator. Part 2

By Susana Sevilla. ASIC verification engineer at Rydev
susana.sevilla@rydevinc.com

Testing verification features

After working around the problems with randomization on Verilator, we ran more experiments on some of the most common features one would expect from a complete Verilator environment. We used the Verilator repository https://github.com/antmicro/verilator-verification-features-tests/pull/421 released on October 2023, where there is a memory test that can be used for testing some UMV components. After parsing the created environment, it is possible to see that the environment is very simple and that several UVM features are not fully tested yet in this Verilator version.

This test performs one write transaction and then a read transaction. But we found that inside the sequences the test uses the UVM macro uvm_do instead of a uvm_do_with (a macro not supported because as we said in part I of this blog entry, the randomize function is not supported yet by Verilator). This entails not being able to choose the type of transaction that is being sent to the driver.  A  possible workaround is to run the commands of the uvm_do macro step-by-step, and manually add the type of transaction before sending the sequence item to the driver.  Notice too that this test does not use any other constraint, and it is not clear whether this on purpose, in order to only read addresses that had been written before. 

A proof of concept using a simple and pure SV environment

We proposed an alternative route, choosing a simpler environment not requiring randomization nor other more advanced UVM features, using the UVM structure statement, in the most simple manner. 

The chosen DUT is a data-bus master-slave, and the designed test generates a master write request transaction that is sent to the slave. The slave has a simulated memory, and when the writing is done, a write confirmation is sent. Then, a read request is sent by the master to verify that the data has been correctly transferred by the data bus. 

For this proof of concept, use of coverage and assertions was avoided. Also, randomization was used in the simplest way possible so that the Verilator version used would not complain. The following are the differences from our approach against a typical environment that uses all of the UVM capabilities defined by the standard:

  1. Analysis ports are replaced with predefined parameterized mailboxes.
  2. The UVM config and sequencer items are not used.
  3. The monitor and driver items are not instantiated within the agent but within the environment.
  4. The agent is used as data generator (as a uvm_sequence)
  5. The scoreboard is a class only created for generating reports.
  6. Checker is the class that verifies the behavior of the DUT.
  7. The standard uvm_infouvm_error, and uvm_fatal procedures are replaced with the standard $display and $finish functions.

The created environment follows the next structure, where the number of masters and slaves were parameterized. 

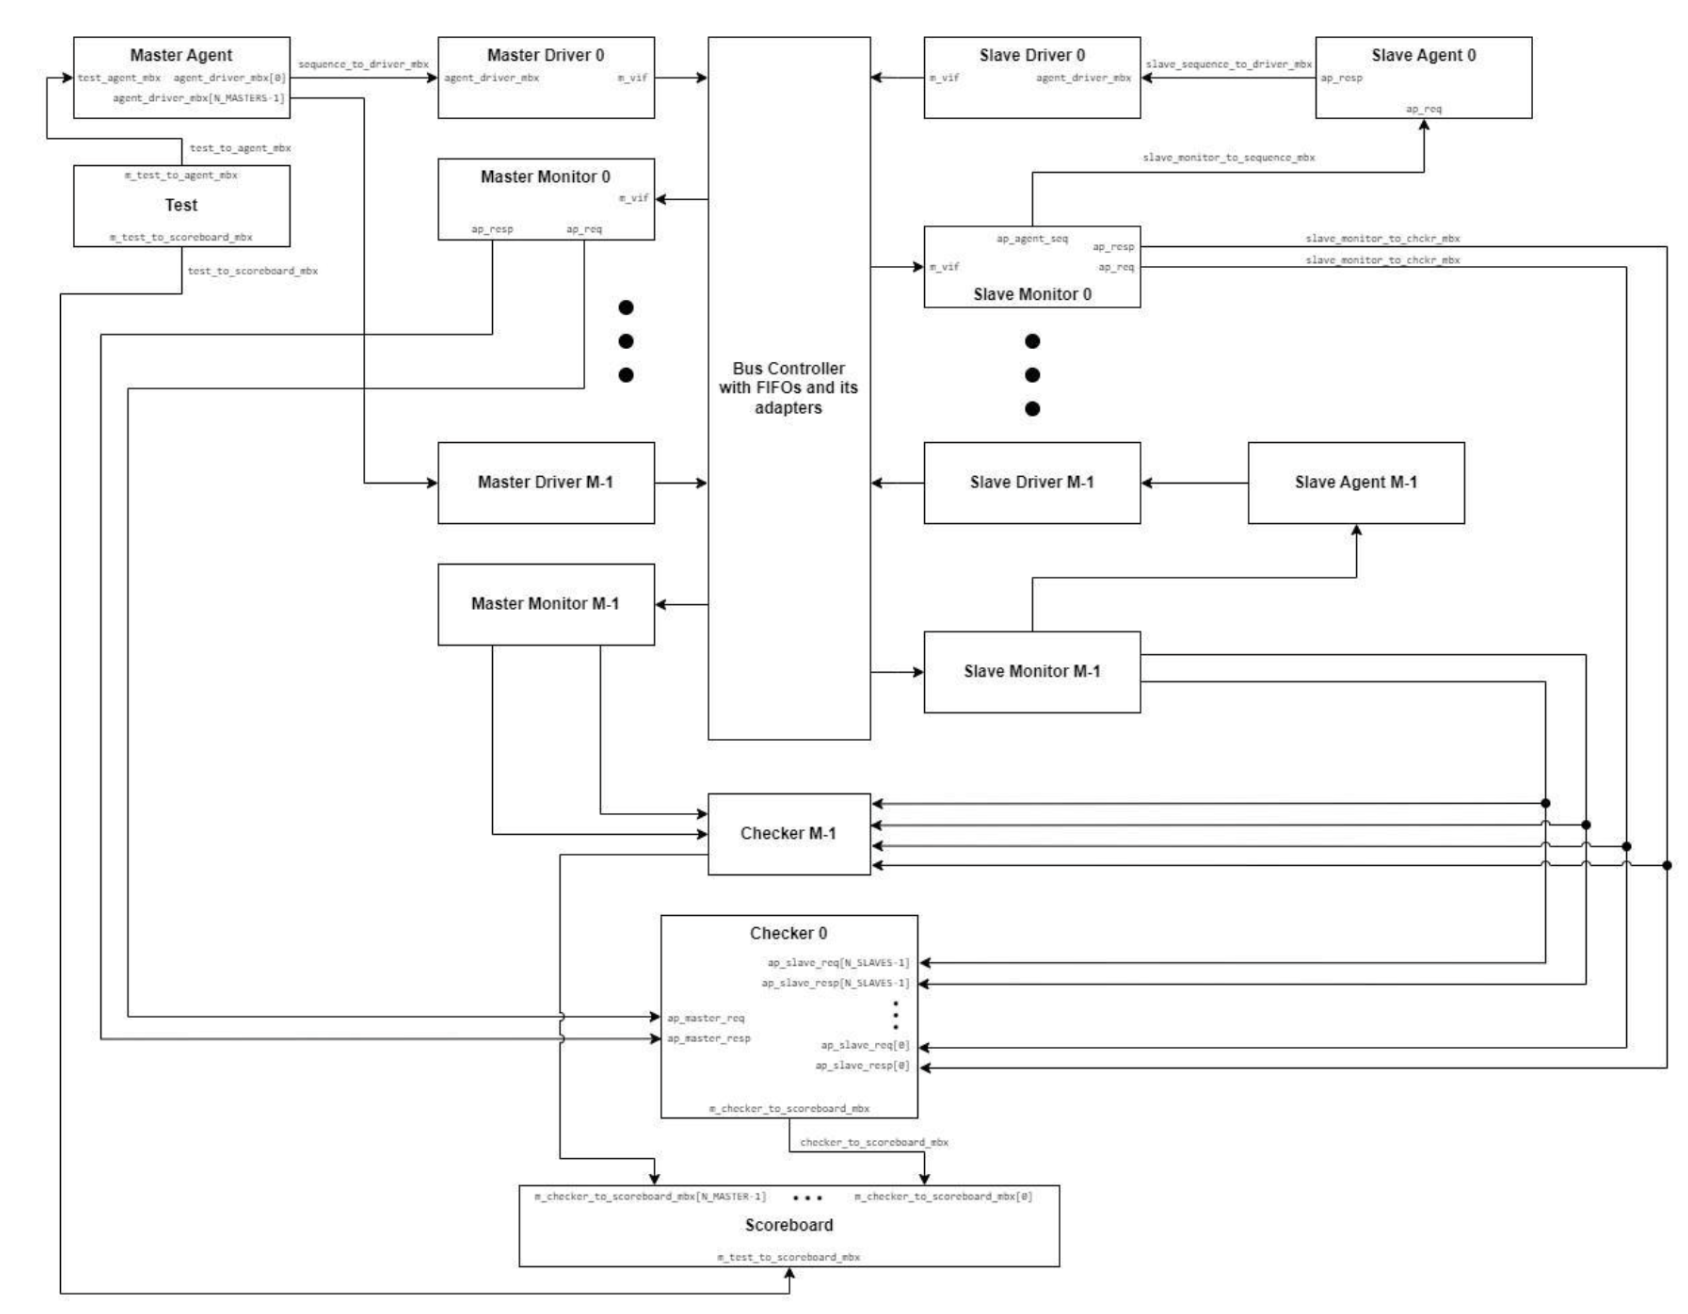
Figure 1. Verilator test environment structure created without using the UVM general capabilities.

Since many of the verification features available in other tools are still under development for Verilator, the environment was first tested with a standard SystemVerilog simulator to ensure that it was correctly designed. One of the main differences that can be appreciated when working without UVM, is that it is necessary to create a series of parametrized mailboxes for sharing data between components. The creation of mailboxes through the new() function and their interconnections are mainly done within the environment component. 

When the test was run in Verilator, first we started with a simple test: only  one master and four slaves. An error related to a broken link caused the interface to not be continuously assigned to our virtual interface. Reducing the number of slaves to one and having a direct connection without generates and loops in our testbench module temporarily fixed the issue, not seen in the tests carried out with an standard simulator. We then added the following modifications that fixed several Verilator execution errors:

A) Each display text is ended in the same line, fixing all Unterminated string reports.

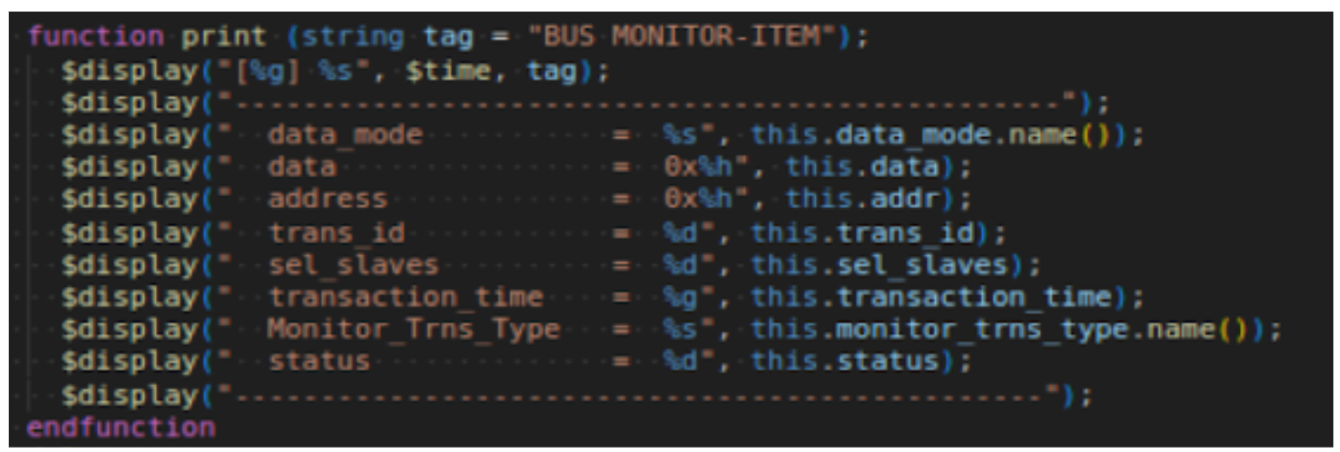
Figure 2. Correct use of the $display statement.

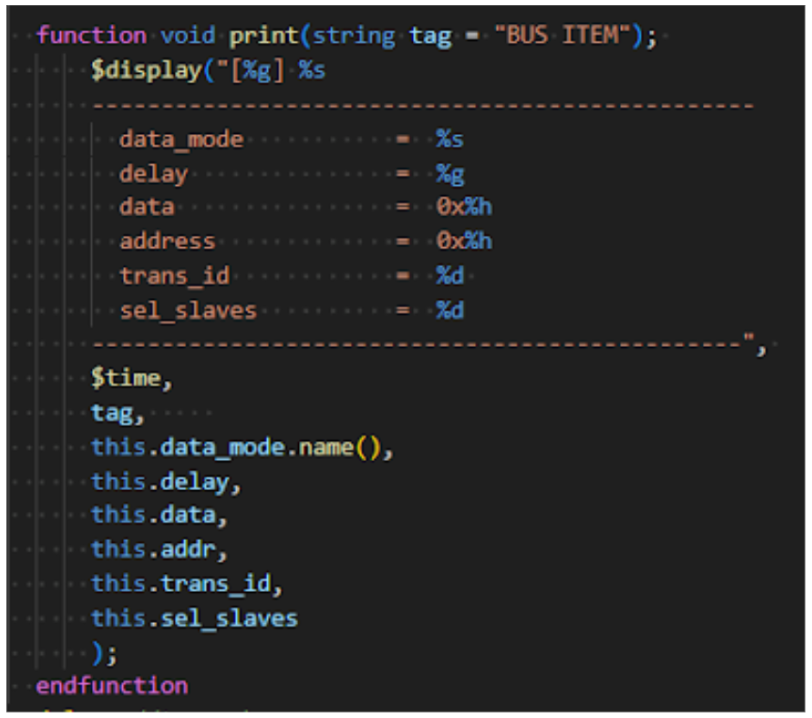
Figure 3. Wrong use of $display statement, that ends up in Verilator reporting an Unterminated string error.

B) Regarding interfaces, the following recommendations must be followed:

    1. All parameters should have an initial value.
    2. Any internal variable must not have an initial value when created.
    3. Interfaces can only execute one line or block of code (the first block in the declaration actually: see Figure 5). If there are any other blocks such as in Figure 5, an error is generated. Clock generation and the initial reset were thus moved to the testbench top module, leading to adding inputs to the interface and keeping only the assignment of o_clk, being a signal that is used by other components when the clk interface is instantiated.

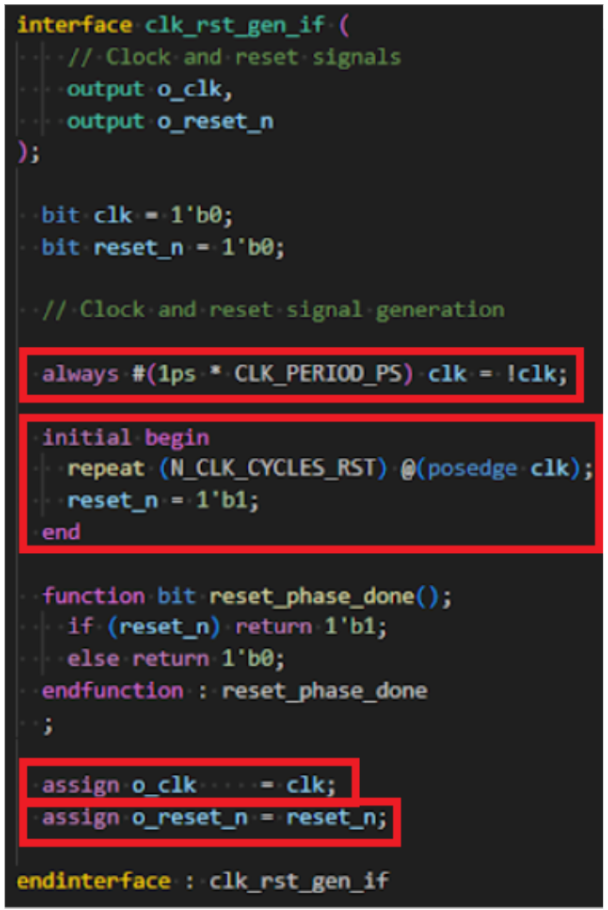
Figure 4. Original interface. Highlighted blocks are concurrent declarations. Verilator only accepts the first one

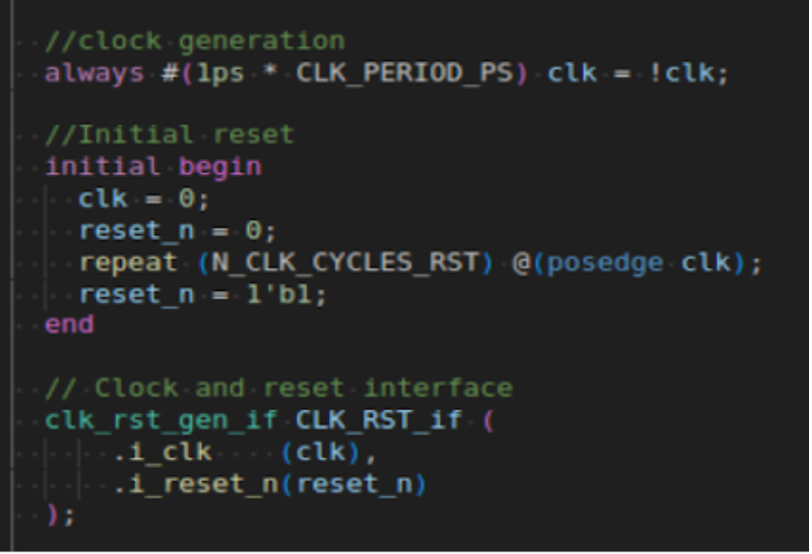
Figure 5. Moving clock generation and initial reset code blocks to the top testbench module.

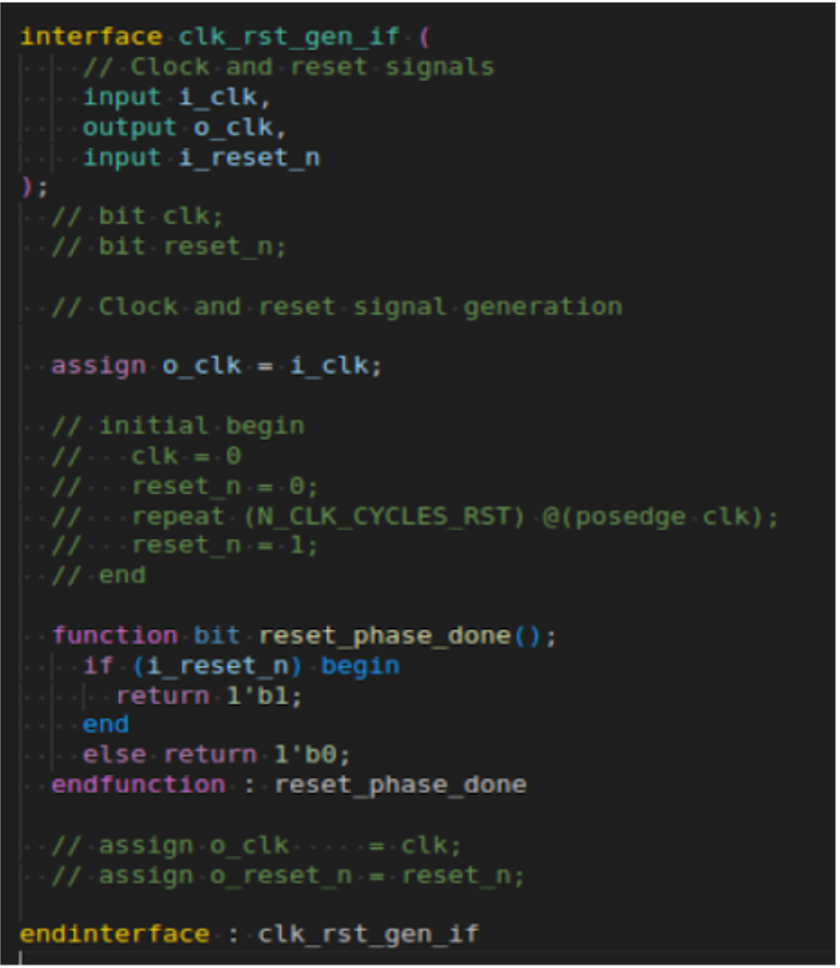
Figure 6. Modified interface, now acceptable to Verilator.

C) In the original test, the sequence waited for an event to be triggered by the monitor to start the read transactions. Typically this is straightforward because of the UVM event pool, which can be easily accessed by any UVM component. In our environment a uvm_event was replaced by an event. To communicate the event between the monitor and the agent, a connection had to be done in the environment component.

Figure 7. Agent waiting for the event to be triggered.

Figure 8. Monitor triggering the event.

D) In our agent we had a random address queue that was used for randomly generating the addresses that were going to be written. Since we already knew that array randomization was not supported, we removed the rand statement from the array and created a rand auxiliary variable. This variable was randomized with $urandom, and the value obtained was saved in the address array. The process was repeated using a loop to fill the address array. Also, since randomize_with() is not supported, it was replaced with a simple randomize(). After the randomization, certain values of the item were modified manually to have the expected values for the sequence to work the right way.

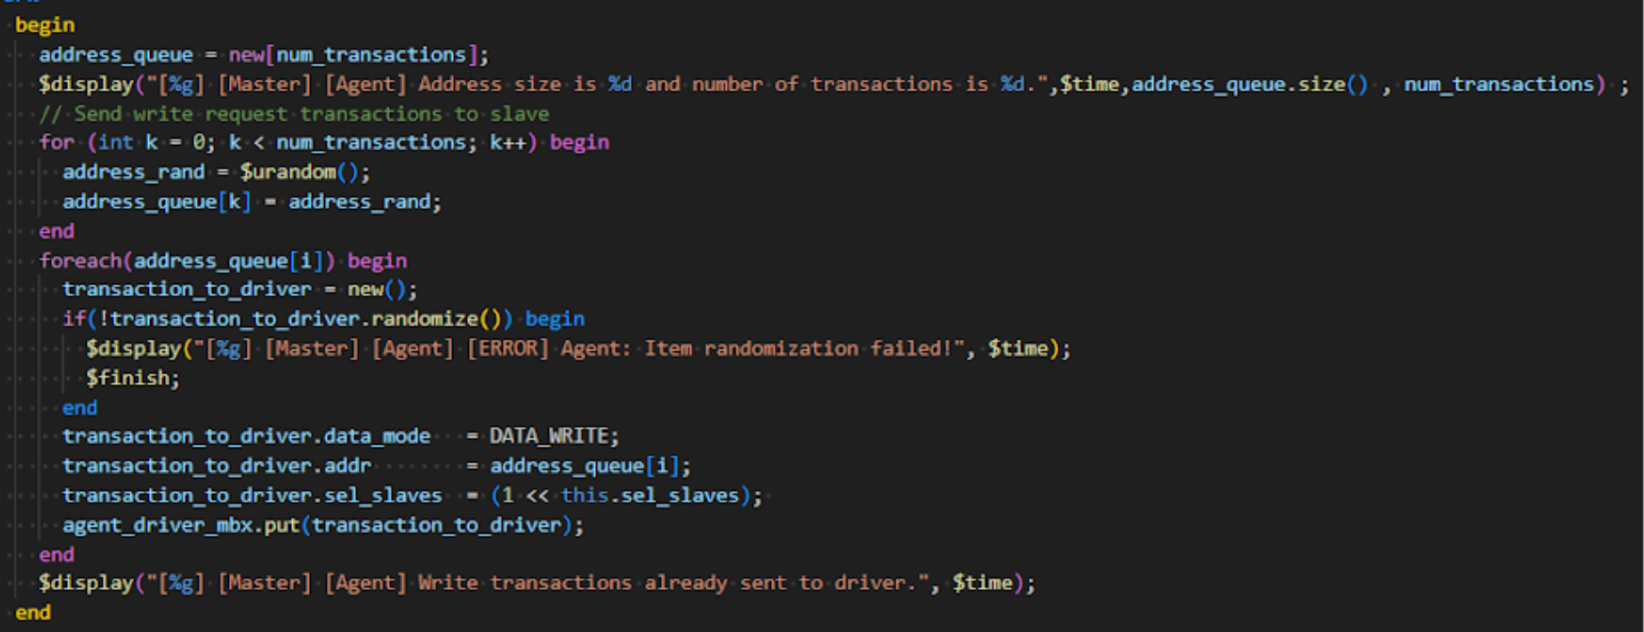
Figure 9. Using a rand auxiliary variable for generating the addresses.

In part III, we’ll explore the dead end we ran into, after fixing the prior issues.

Some tips on working around UVM limitations in Verilator. Part 2